Archiving moves your old emails from the mailbox on the server to a local data file (.pst) on your computer. It frees up space in your mailbox without deleting the messages, which remain available in Outlook.
In short: in classic Outlook, create a .pst file in the Data Files tab of Account Settings, then open File > Tools > Clean Up Old Items, enter a date and select that file under Archive file. Archived items leave the server.
Prerequisites
- Classic Outlook for Windows, with your email address already set up.
What to know before you start
- Archived items are no longer on the server: they no longer appear in webmail or on your other devices, only in Outlook on this computer.
- The archive file is only backed up if you back it up yourself: make sure it is included in your computer's backups.
- The menus below and the screenshots may differ slightly depending on your version of Outlook. The new Outlook for Windows and Outlook for Mac do not follow this procedure.
How do I create the archive file?
- Click the File tab.
- Click Account Settings.
- In the menu that opens, click Account Settings (in some versions, Manage Profiles).
 In the window that opens, click the Data Files tab.
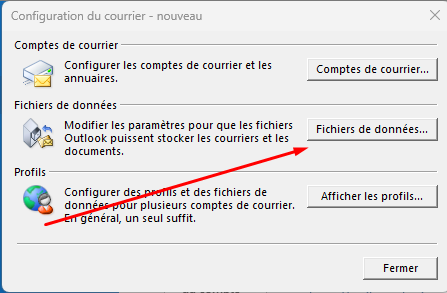
- Click Add, and create a new file, for example "my archives.pst".
- Save, close the window and return to Outlook.
How do I archive old items?
- Open the archive tool: File > Tools > Clean Up Old Items (in older versions, Tools menu > Clean Up Old Items).
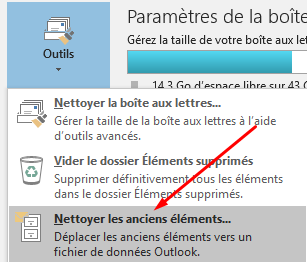
- Under Archive items older than, enter a date.
- Under Archive file, click Browse and select the data file you just created, then click OK. The location of the file appears in the Archive file box.
- If you wish, check the box Include items with "Do not AutoArchive" checked. It does not remove the exclusion of these items: it ignores the Do not AutoArchive checkbox for this archive only.
- Click OK.
Outlook archives the items older than the selected date into this local data file and frees up space on the server.
Going further