Valkey is an in-memory data store, compatible with Redis. It acts as an object cache for your applications: WordPress, Joomla, PrestaShop, Laravel or any software that can talk to Redis. Frequently read data (SQL query results, sessions, page fragments) stays in memory, and your site queries its MySQL database less often.
From the Apanel console, you can create your own Valkey instance, start it, stop it, flush it and monitor its usage.
Requirements
- A hosting plan that includes Valkey. If the Valkey (Redis) button does not appear in your console, contact support.
- An application that can connect to Redis through a Unix socket (see below).
Before you start
- One instance per hosting account. The instance is shared by every site on your account.
- Local access only. The connection goes through a socket file on the server. No remote connection (host name and port) is possible: only the applications hosted on your account can use it.
- No persistence. The content is lost whenever the instance or the server restarts. Only store data your application can rebuild: that is what a cache is for.
- Limited memory. The limit is fixed (128 MB) and shown on the instance page. When it is reached, the least recently used keys are removed automatically to make room for new ones.
- Automatic start. The instance is restarted automatically after a server reboot.
Create your instance
- Log in to your Apanel console.
- From the dashboard, click your domain name to open Hosting management.
- In the Databases card, click Valkey (Redis).

- In the Create your Valkey instance block, choose the Version (Valkey 8 or Valkey 9). Unless you have a specific constraint, pick the most recent one.
- Click Install.
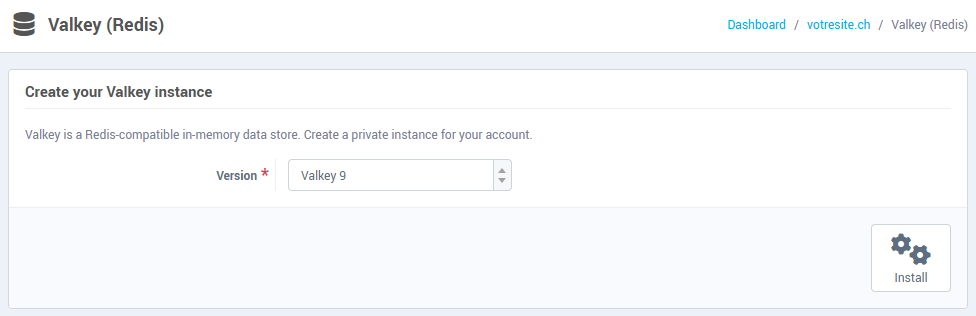
The instance is created and started. The page then shows its details and everything you need to connect your applications to it.
Connection details
The Using your instance in your applications block gives the two values to enter in your application's configuration:
- Socket file: the socket path, in the form
/home/your-account/.data/valkey/valkey.sock.
- Password: the instance password, which is required.
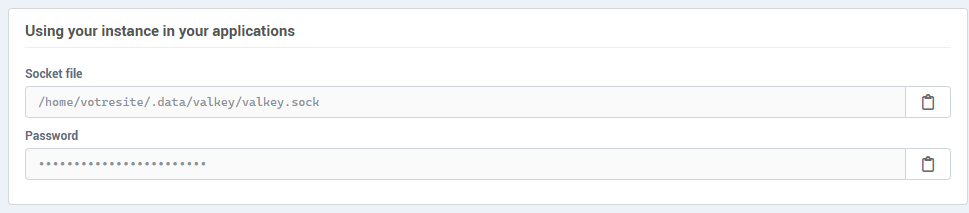
The button to the right of each field copies the value to the clipboard.
Configure WordPress
- In the WordPress administration, install and activate the Redis Object Cache plugin.
- On the Valkey page of the console, the Hints block contains a ready-to-copy configuration, already filled in with your socket and password:
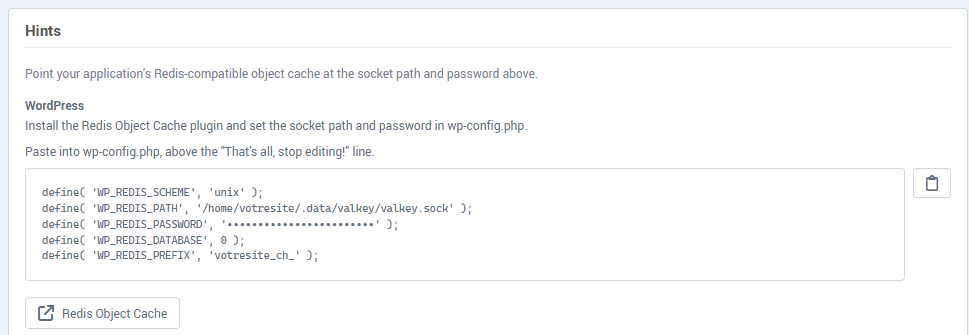
It looks like this:
define( 'WP_REDIS_SCHEME', 'unix' );
define( 'WP_REDIS_PATH', '/home/your-account/.data/valkey/valkey.sock' );
define( 'WP_REDIS_PASSWORD', 'your-password' );
define( 'WP_REDIS_DATABASE', 0 );
define( 'WP_REDIS_PREFIX', 'yourdomain_ch_' );
- Paste this block into the
wp-config.php file, above the line that starts with /* That's all, stop editing!.
- In WordPress, open Settings → Redis and enable the object cache (Enable Object Cache). The status should show that the connection is established.
Several sites on the same hosting account
Your instance is shared by every site on the account. Give each site its own database (0, 1, 2, …): otherwise they share the same keys and flush each other.
For WordPress, change the value of WP_REDIS_DATABASE on each site (0 for the first, 1 for the second, and so on). The instance has 32 databases, numbered 0 to 31; this number is shown on the instance page, on the Available databases line.
Other applications
For Joomla, PrestaShop, Laravel or a custom application, enter the following in the application's Redis configuration:
- the socket path instead of the host name (if a port is required, enter
0);
- the instance password;
- a database number specific to each site.
The Hints block in the console links to the Joomla and PrestaShop documentation. Check your application's documentation to find out whether it accepts a Unix socket.
Manage the instance
The Valkey instance block shows the version, the connection mode, the number of available databases and the Status (Running, Stopped or Unknown). The available buttons:
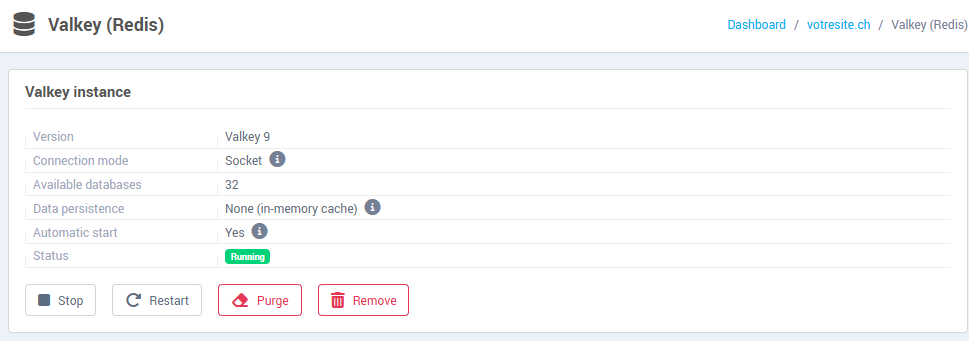
| Button |
Effect |
| Start |
Starts a stopped instance. |
| Stop |
Stops the instance. Its content is lost. |
| Restart |
Stops and restarts the instance. Its content is lost. |
| Purge |
Deletes all cached data without stopping the instance. Only available while the instance is running. |
| Remove |
Stops and permanently removes the instance and all its data. |
Purge and Remove ask for confirmation. Once the instance is removed, your application can no longer reach the cache: remove its Redis configuration first (for WordPress, deactivate the Redis Object Cache plugin).
Monitor usage
While the instance is running, the Instance usage block shows:
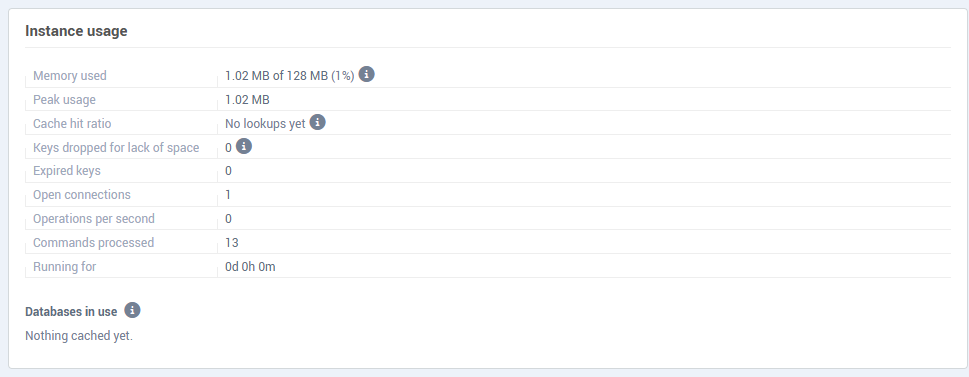
- Memory used, against the instance limit, and the Peak usage;
- Cache hit ratio: the share of reads served by the cache. A ratio that stays low usually means the application is not actually using the cache; check its configuration;
- Keys dropped for lack of space: if this counter increases, your application writes more data than the instance can hold;
- expired keys, open connections, operations per second and uptime;
- Databases in use: the number of keys in each database. This lets you check that each site writes to its own.
SSH access
If you have SSH access, the Access the instance from SSH block gives a ready-to-copy Access command that opens valkey-cli on your instance. The same block shows where the Log file is.

Troubleshooting
- The status is "Unknown": the state of the instance could not be read on the server. Reload the page after a few moments.
- "The instance is running but does not answer on its socket": click Restart. If the message persists, contact support.
- The site shows an error after the instance was stopped or removed: the application is still looking for the cache. Restart the instance, or remove the Redis configuration from the application.