WP Super Cache is a WordPress plugin that saves your pages as static files and serves them directly to visitors, without rebuilding each page. Your website responds faster and puts less load on the server.
In short: in WordPress, Plugins then Add New Plugin, install and activate WP Super Cache, check Caching On, then select delivery by rewrite rules in the Advanced tab. Permalinks must be enabled.
Prerequisites
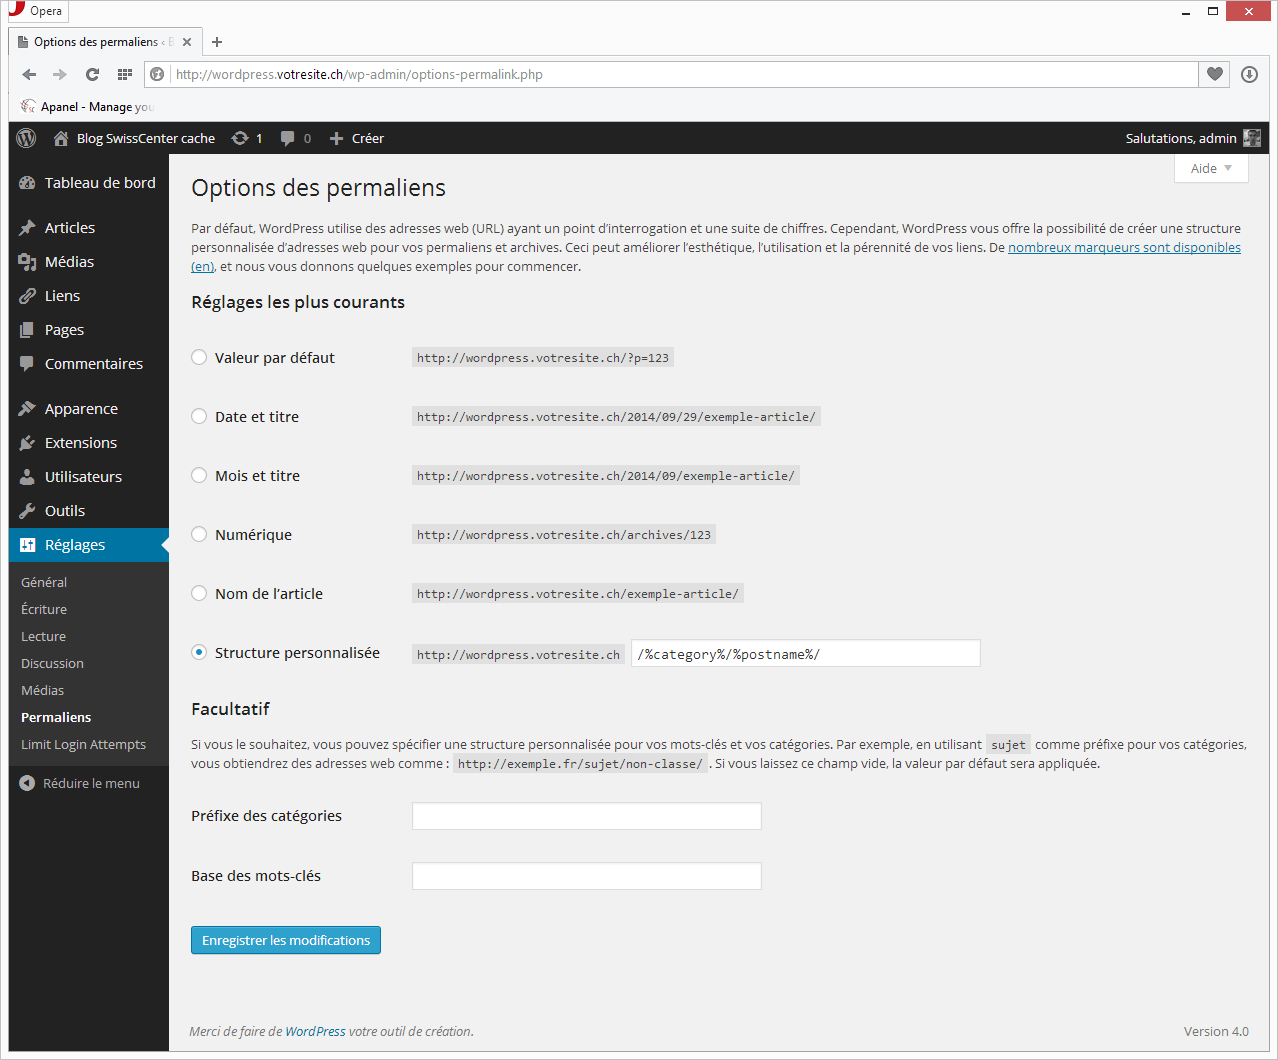
- Permalinks must be enabled in your WordPress settings.
How do I install the plugin?
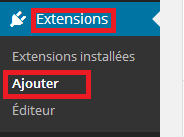
- In the left-hand menu, click Plugins then Add New Plugin.
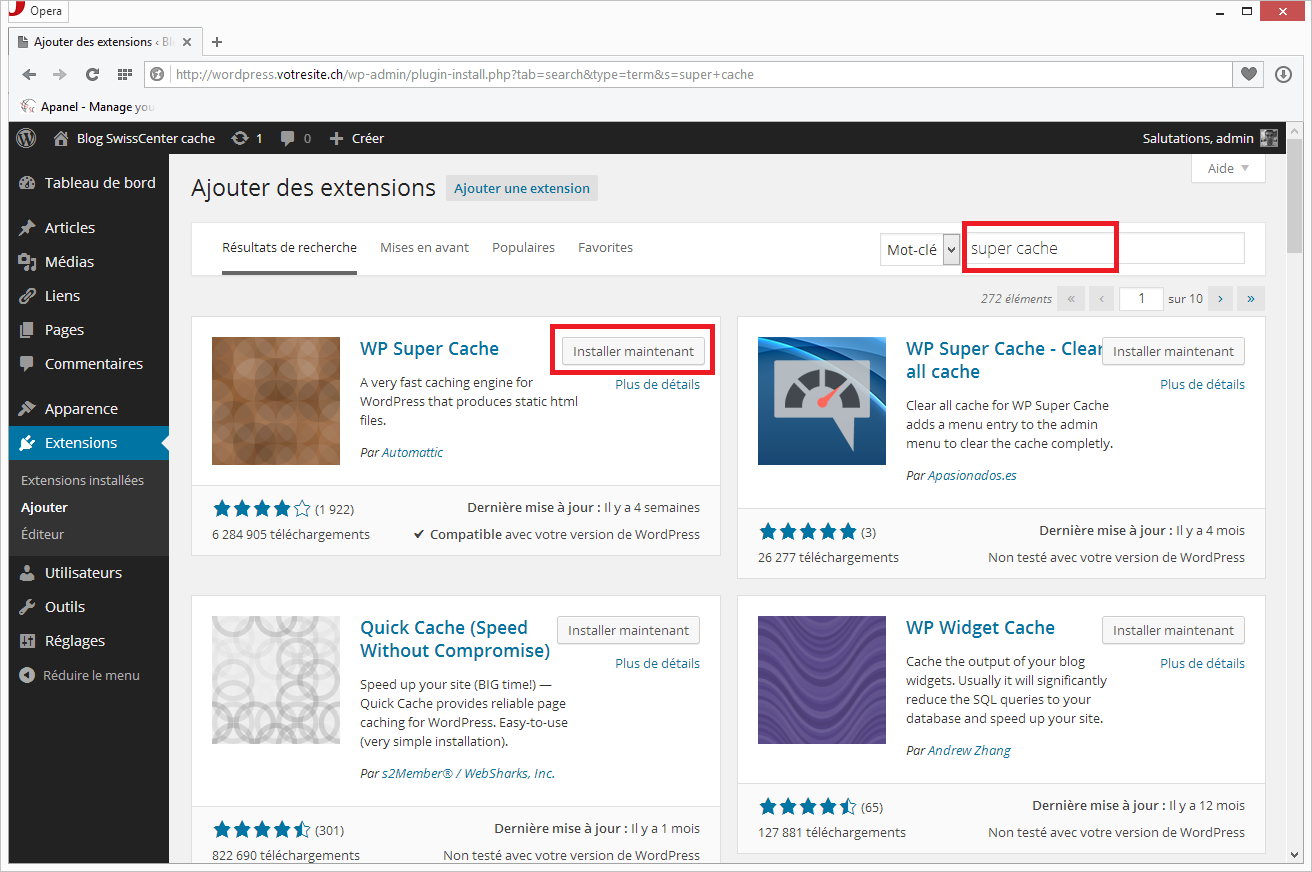
- In the search field at the top right, type "super cache", run the search, and click Install Now next to WP Super Cache.
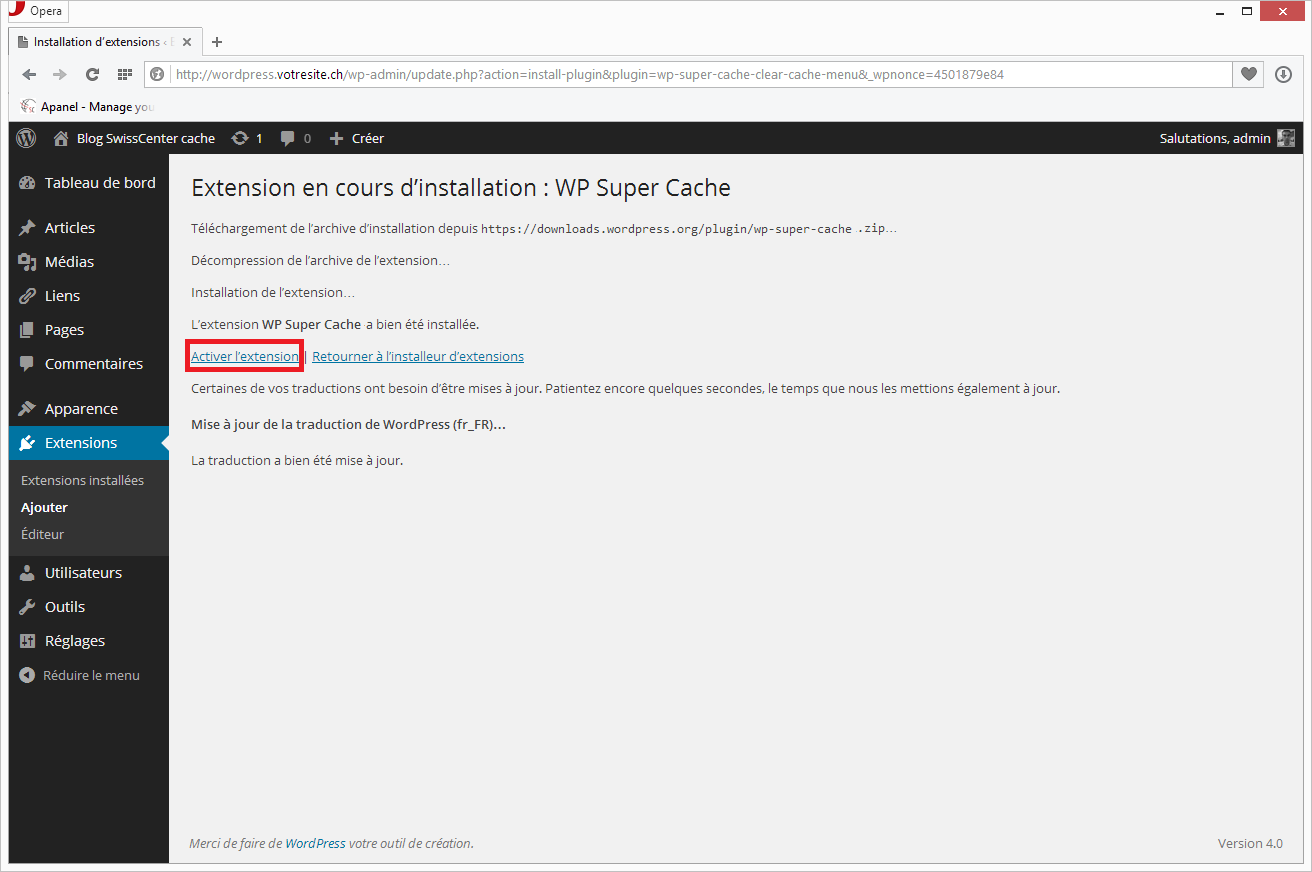
Your browser may ask for confirmation via a pop-up window that you need to accept. A new page indicates that the installation is in progress.
- Click Activate Plugin.
How do I turn caching on?
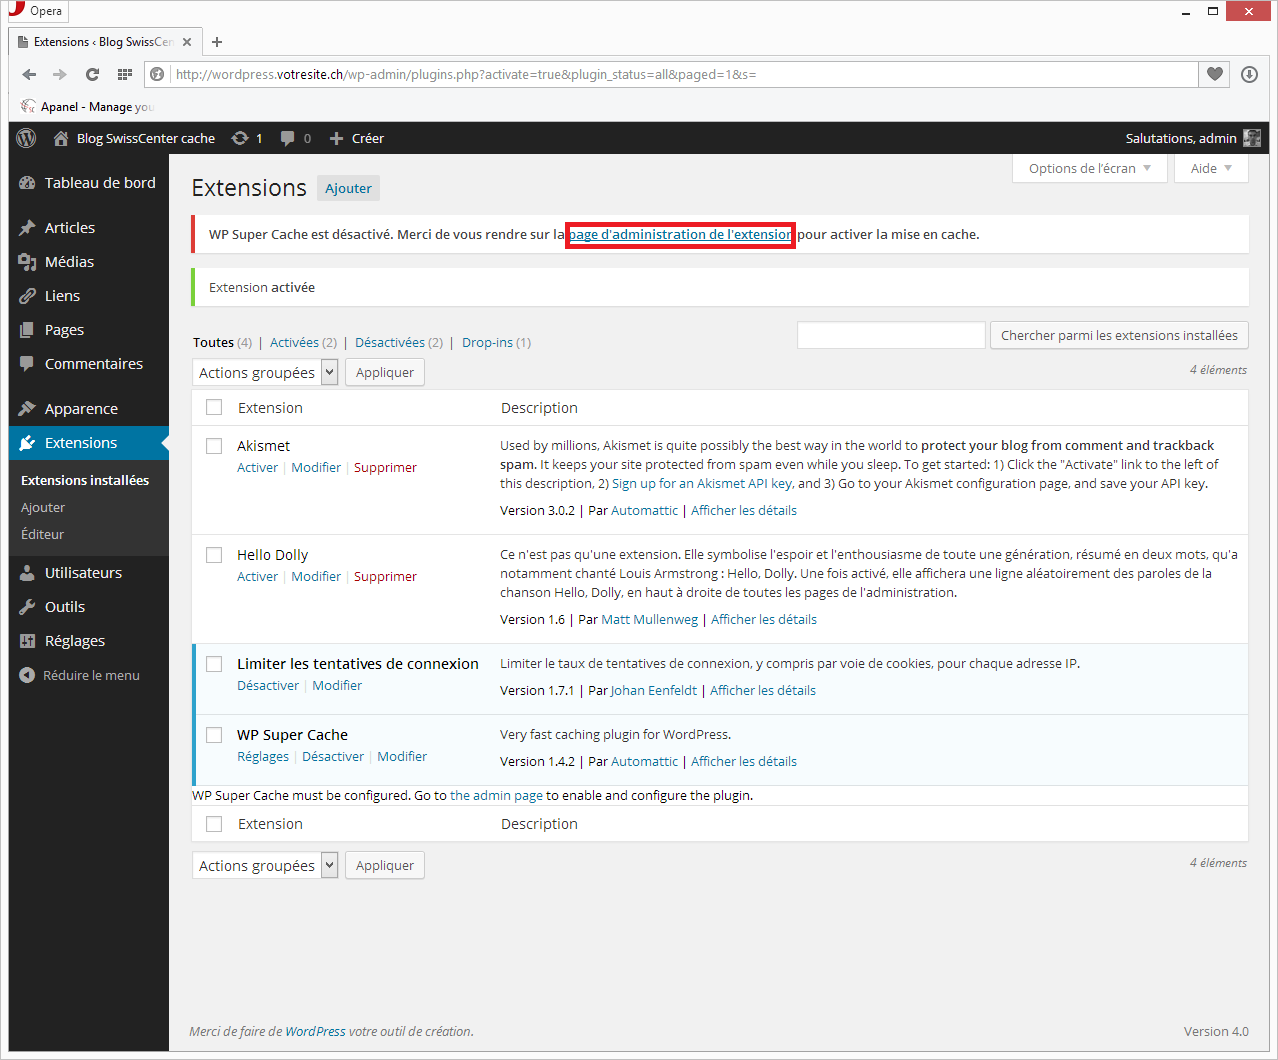
- A new page appears informing you that the plugin is not yet active. Click the link at the top of the page inviting you to go to the plugin administration.
- Check the box Caching On and click Update Status.
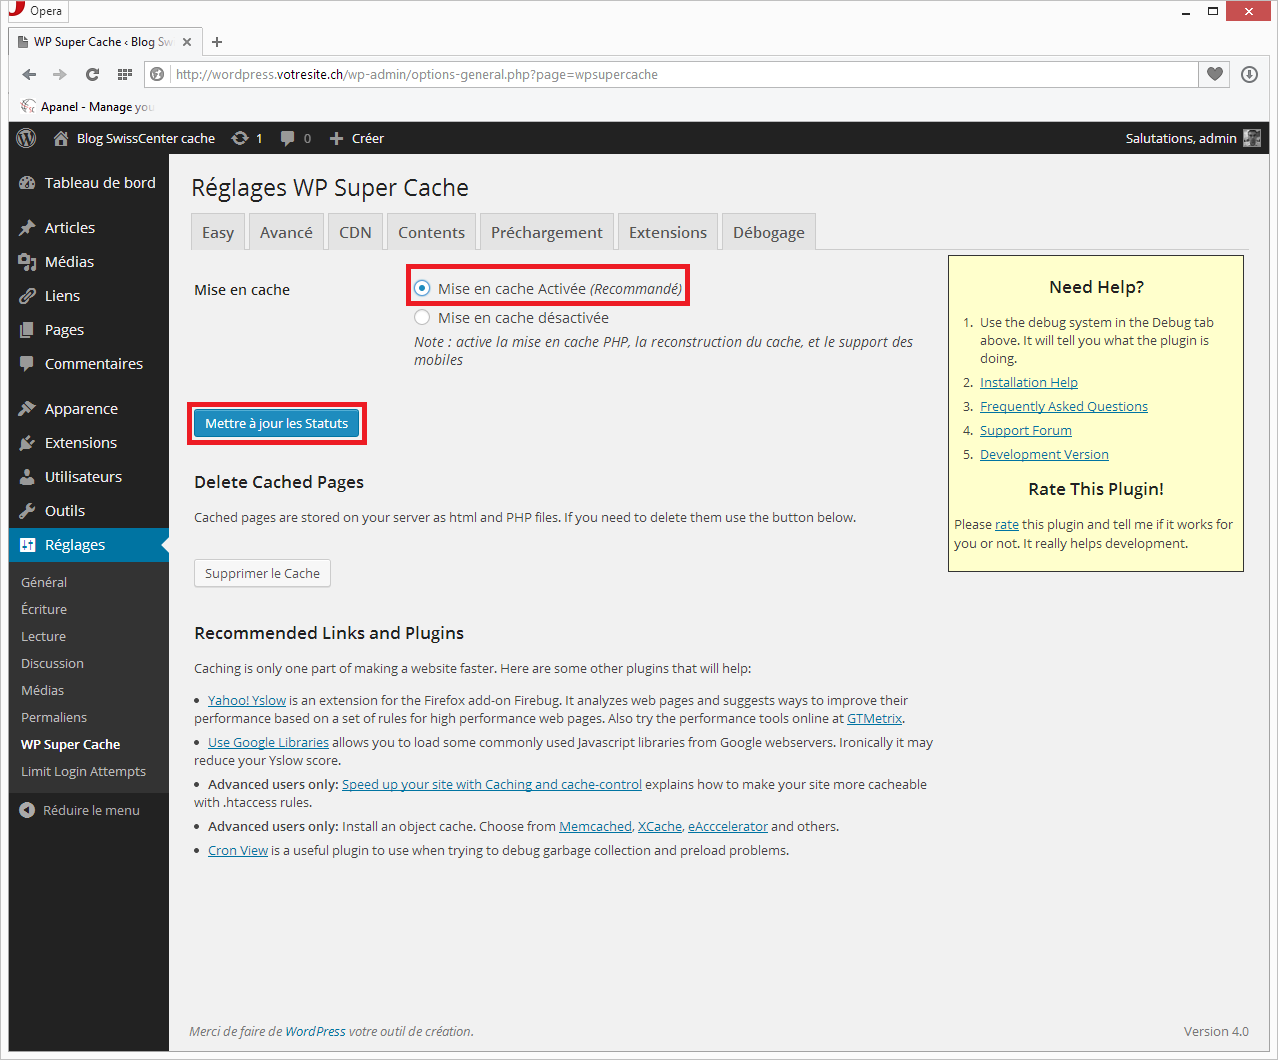
Your caching plugin is now enabled.
Which cache delivery method should I choose?
The final step is to configure the plugin for better performance. The labels on this screen change with the version of WP Super Cache: the screenshots below show an older version.
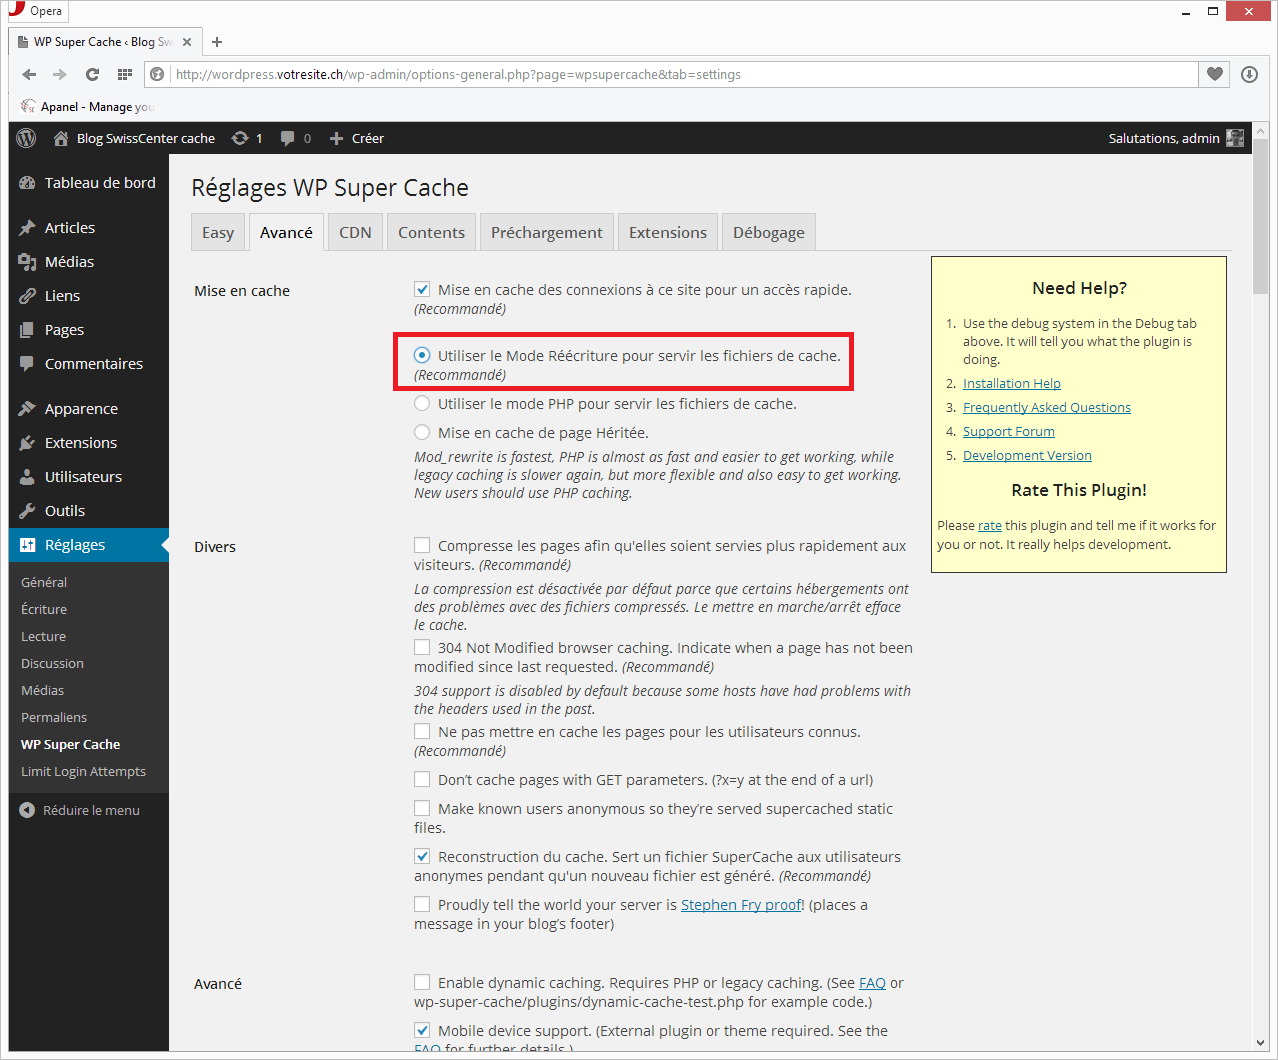
- Go to the Advanced tab and select delivery by rewrite rules (Expert in recent versions, Use Mod_rewrite to serve cache files in older ones).
- If the plugin offers it, update the rewrite rules to ensure the change is applied.
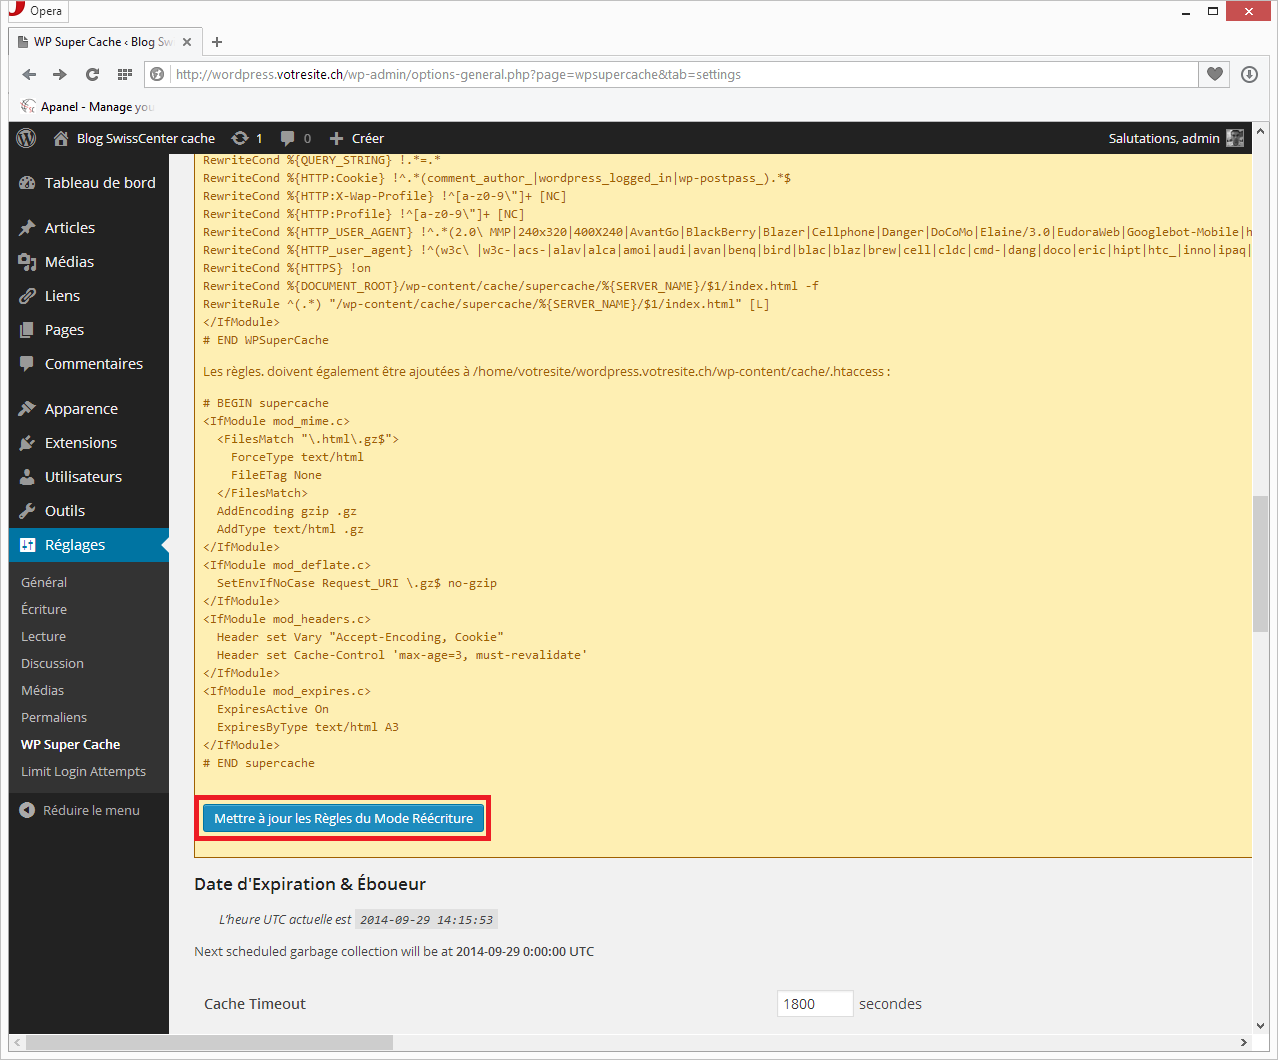
Your .htaccess file has now been updated and your website serves its pages from the cache.
Troubleshooting
- A change on your website does not show to visitors: the pages served still come from the cache. Clear the cache from the WP Super Cache settings.
Going further